
At the end of this part you will have:
A C/C++ project which you have set up to use the Adobe AIR C API.
Note that, although the steps here are done with Microsoft Visual C++, you don’t necessarily need to stick with it. Any IDE or command-line compiler that builds C/C++ code will do, for example GCC. The most important steps in this part of the tutorial are making sure that your C/C++ code can see FlashRuntimeExtensions.h and link with FlashRuntimeExtensions.lib from the Adobe AIR SDK.
Time
8-10 miutes
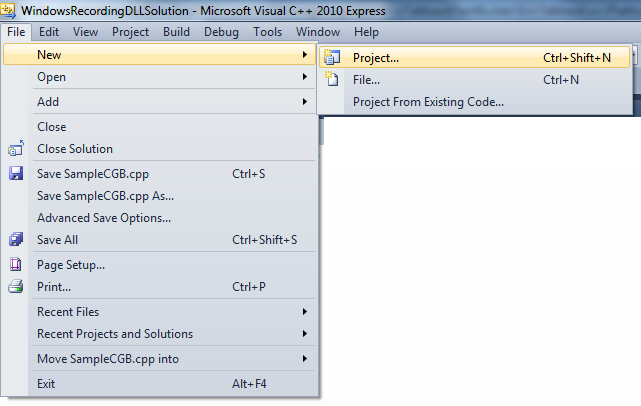
Step 1: Create a Visual C++ project
In Visual C++ select File > New > Project:
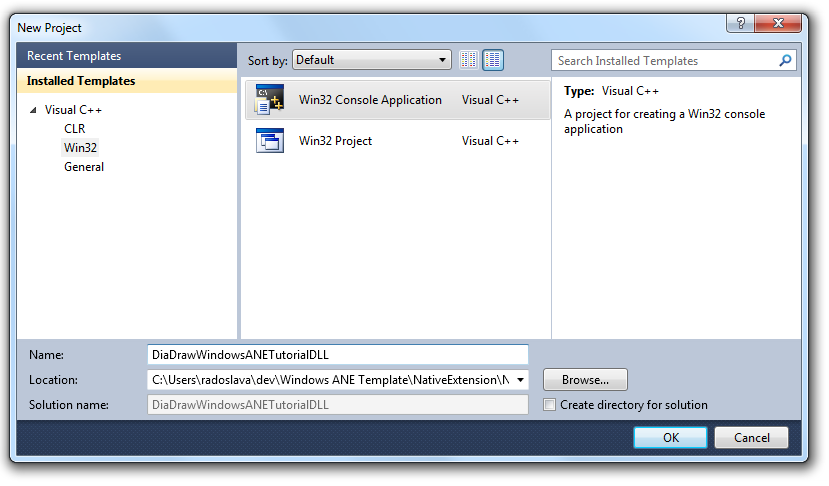
Choose Win32 > Win32 Console Application as the type of your project. Yes, I know we are making a DLL. This choice will make sense in the next step, I promise.
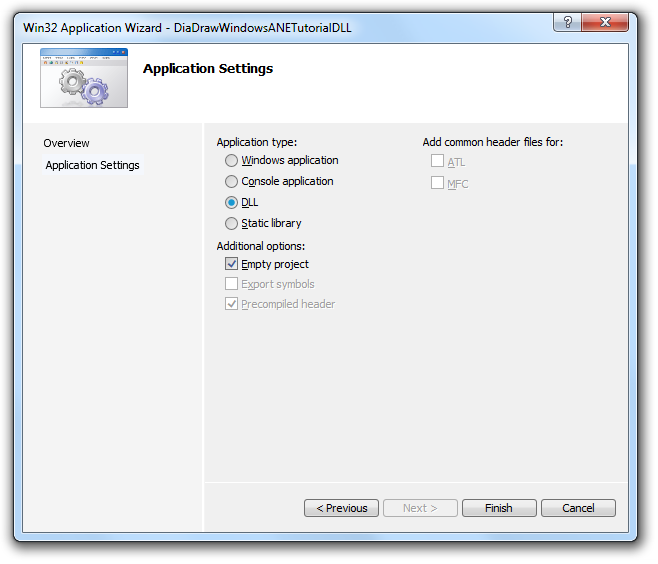
In the wizard that appears click Next and on the Application Settings page select Application Type: DLL.
Empty project?
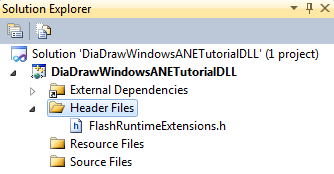
Hit Finish and you should end up with the following pretty boring project structure in Visual C++’s Solution Explorer:

Step 2: Set up your project to see the AIR C API
Thank you, David!
In Solution Explorer right-click on Header Files, then select Add > Existing Item. Navigate to your AIR SDK installation and find the include folder; from it select FlashRuntimeExensions.h. For example: C:\Program Files (x86)\Adobe\Adobe Flash Builder 4.6\sdks\4.6.0\include\FlashRuntimeExtensions.h.
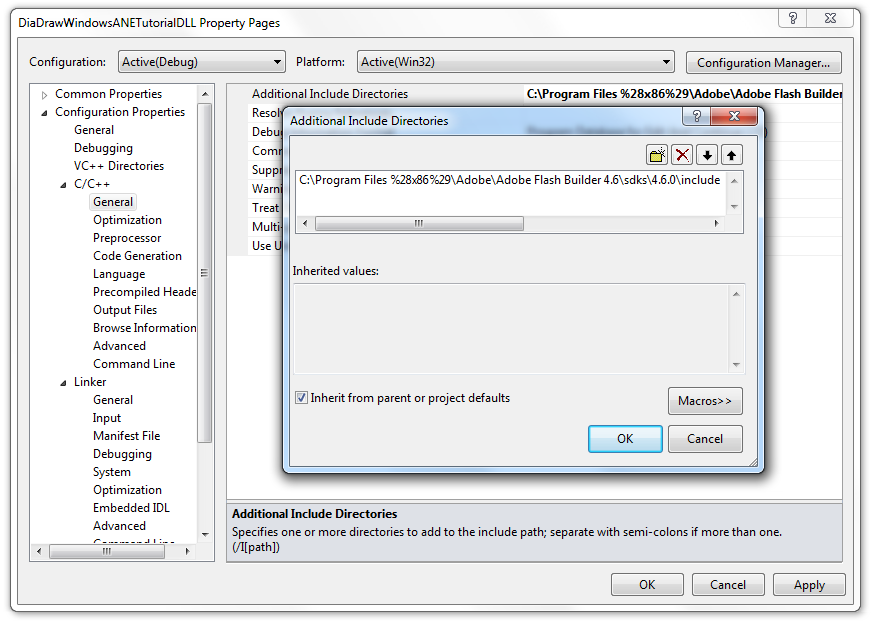
If you choose to use FlashRuntimeExtensions.h from the Adobe AIR SDK folder directly, don’t forget to tell your project to look for it in that folder. Go to your project’s Properties and under C/C++ > General > Additional Include Directories add the path to the folder which contains FlashRuntimeExtensions.h:
Your project should now look a little less boring:
Step 3: Tell the linker where the AIR C implementation is
What the previous step has done is expose Adobe AIR C API to the code you are about to write. This header however contains only definitions like this one and no implementation:
|
1 2 3 4 5 |
typedef FREObject (*FREFunction)( FREContext ctx, void* functionData, uint32_t argc, FREObject argv[]) |
In order to make the imlpementation available to your code, you need to get your project to use the static library in which it lives. You do this in two stages:
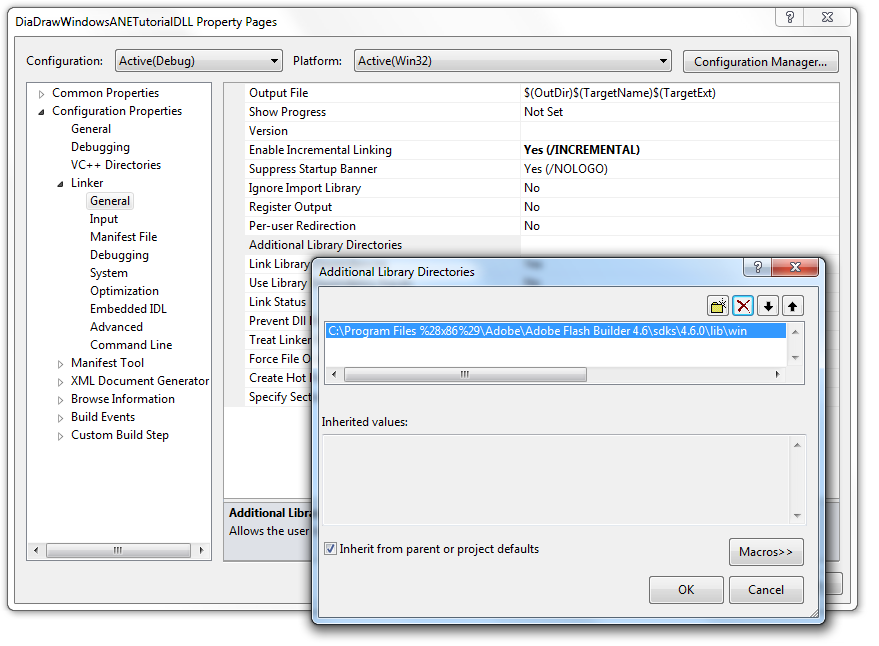
First, open your project’s property pages (right-click your project in Solution Explorer and select Properties) and under Linker > General > Additional Library Directories add the path to the folder in your Adobe AIR SDK where FlashRuntimeExtensions.lib lives.
In my install it is in C:\Program Files (x86)\Adobe\Adobe Flash Builder 4.6\sdks\4.6.0\lib\win.
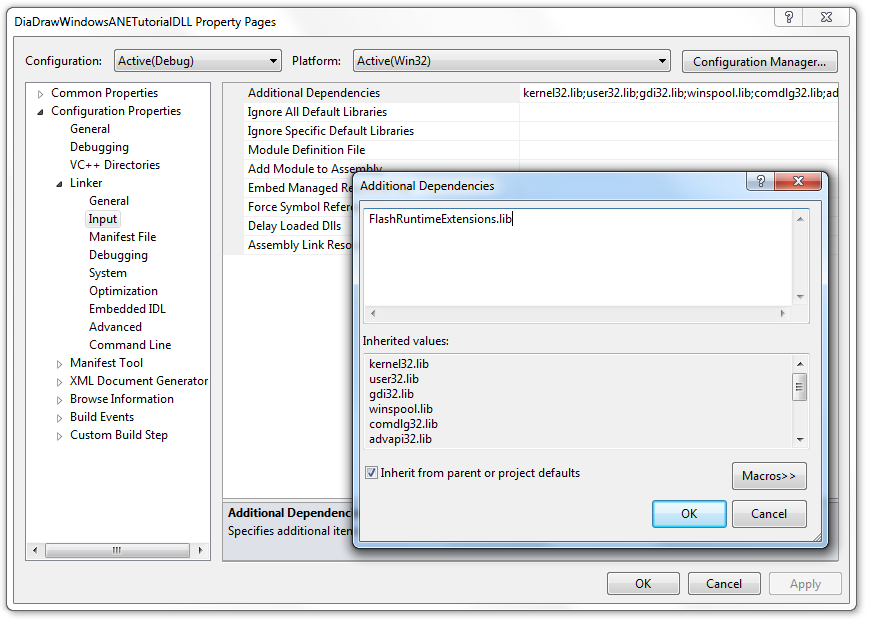
Next, tell your project the name of the static library you are interested in. Still in Properties open Linker > Input > Additional Dependencies and add FlashRuntimeExtensions.lib as shown below:
Step 4: Add a source file and build the DLL
In Solution Explorer right-click Source Files, then select Add > New Item…
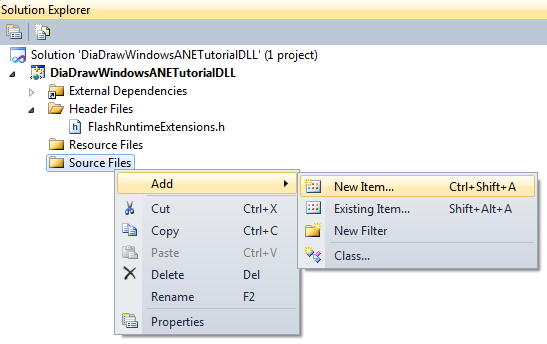
Select C++ File (.cpp) as the type of your file and give it a name. I’ve named mine dllMain.cpp:
 Now let’s build the project. Shock, horror! No code yet and we can get a DLL out of this:
|
1 2 3 4 |
1>------ Build started: Project: DiaDrawWindowsANETutorialDLL, Configuration: Debug Win32 ------ 1> dllMain.cpp 1> DiaDrawWindowsANETutorialDLL.vcxproj -> C:\Users\radoslava\dev\Windows ANE Template\NativeExtension\NativeLibrary\win\DiaDrawWindowsANETutorialDLL\Debug\DiaDrawWindowsANETutorialDLL.dll ========== Build: 1 succeeded, 0 failed, 0 up-to-date, 0 skipped ========== |
I know your hands are itching to code, so let us move on to that. Go to the next part of this tutorial.
What’s next?
- Part 2: The Native DLL code, 10-15 minutes
- See the table of contents for the tutorial, in case you want to jump back or ahead.
Helpful reading
If you are new to Windows programming, you may find this helpful:

Buy any Easy Native Extensions 2nd Edition package and get our $99 iOS + Android ANE Template completely free before the end of June 2015.
- step-by-step guide to making your iOS extension in under an hour
- library for data conversion between ActionScript and native code
- tutorials
- infographics
- code included

thank you.
a great start!
In VisualStudio 2015 and VisualStudio 2017, it would seem Step 4 is required before Step 2 (even if it’s just an empty dllMain.cpp file), otherwise the Configuration Properties > C/C++ menu item is suppressed.
Thank you for this update, David! I’ve added a note in the tutorial.