

Buy any Easy Native Extensions 2nd Edition package and get our $99 iOS + Android ANE Template completely free before the end of June 2015.
- step-by-step guide to making your iOS extension in under an hour
- library for data conversion between ActionScript and native code
- tutorials
- infographics
- code included
This is a companion article for our Camera Tutorial series. The technique described here will make sense even if you haven’t done the tutorial, though I’ve kept the buffer names consistent with how they are set in the tutorial.
How frames are captured from the native camera
First, let’s have a birds-eye view reminder of how frames are captured from the camera and passed to ActionScript – in the case of our tutorial – for displaying.
1. Every time the camera produces a video frame, it sends it to your code for processing (copying, modifying, displaying, admiring, whatever rocks your boat).
Frames arrive on a thread, which I’ll call the Camera Thread.
2. When your code gets a video frame, it makes a copy of it and stores it. This copying also happens on the Camera Thread.
3. When the app that uses your camera ANE is ready to consume another frame, it asks your code for a copy of the last frame it’s stored. This happens on the main thread, which we’ll call the Consumer Thread.
![]()
Triple buffering
In normal triple buffering you’d keep three buffers around: one, which your Consumer Thread will read and two back buffers, one of which will always be available to the Camera Thread for writing into. You’ll then keep swapping buffers when an operation – reading or writing – finishes.
Fake triple buffering
… is almost the same thing, only in this tutorial we don’t keep the actual buffers. Instead, we juggle three pointers, pretending that there are buffers behind them. This helps save on the memory that your app keeps hold of.
If you are less concerned with memory performance, but more concerned with speed, you’d be better off with proper triple buffering, with which you won’t be allocating and destroying blocks of memory every time.
Time to confess something: if you pay attention, you’ll probably notice that with the fake triple buffering technique we actually end up with two buffers hanging around occasionally. Shhh, don’t tell anyone.
Alright, let’s fake it
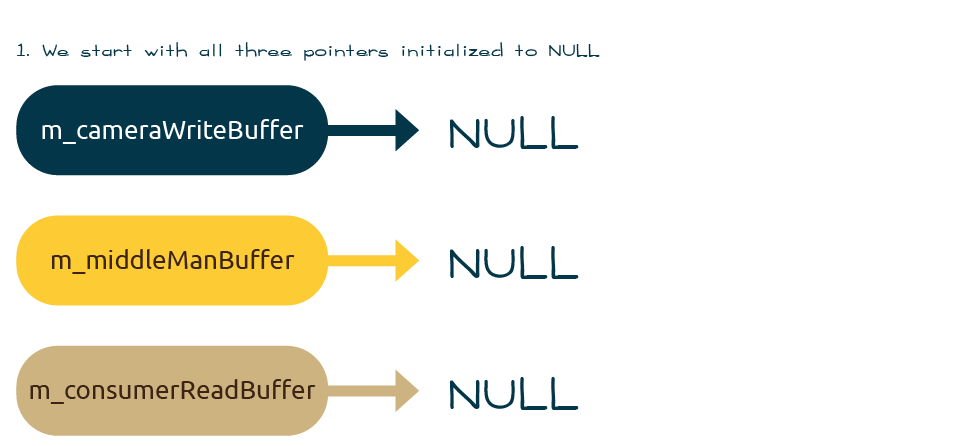
Here are our three buffer pointers (if the names don’t make sense, see their declaration in context in Part 6 of this tutorial).
|
1 2 3 |
NSData * m_cameraWriteBuffer; // Pixels, captured from the camera, are copied here NSData * m_middleManBuffer; // Pixels will be read from here NSData * m_consumerReadBuffer; // Pixels are copied from this buffer into the ActionScript buffer |
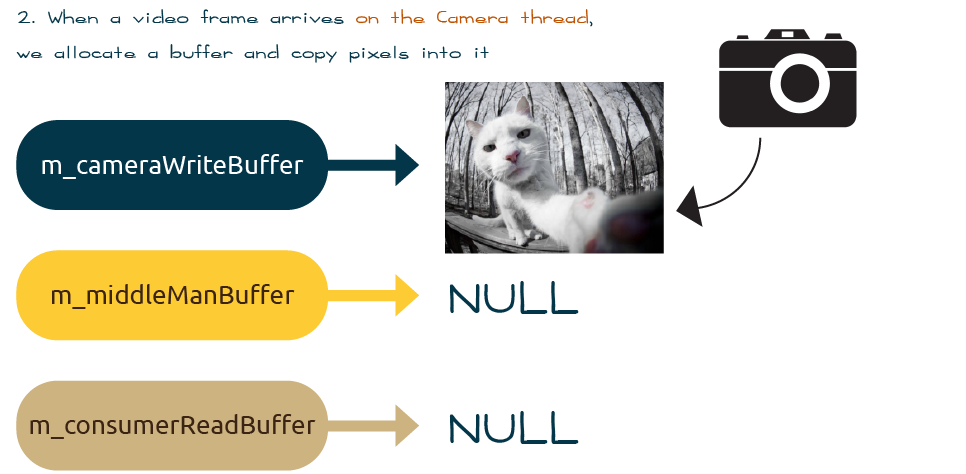
Then a video frame arrives on the Camera Thread and we allocate a block of memory to copy it, then have the write buffer point to that block of memory.
On the same thread, we swap the write buffer an the middle man buffer. Now our middle man points to a valid video frame. This pointer swap is the one thing we need to make sure is performed by only one thread at a time.

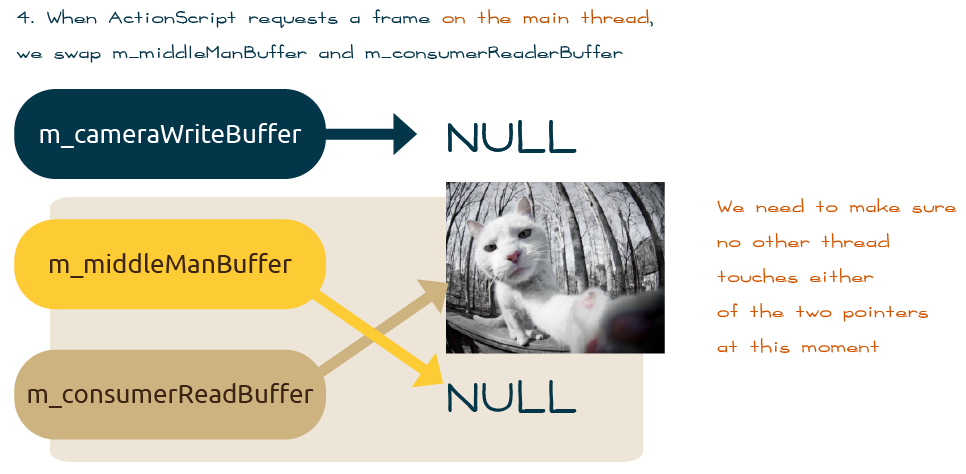
At some point ActionScript knocks on the door of the main thread and asks for a video frame. We’ll let it read it from the read buffer, but first we need to make sure it points to a valid video frame, so we swap the middle man buffer and the read buffer. This second pointer swap is the other place which we want only one thread to be able to run at the same time. We’ll also want to guarantee it will never run at the same time as the pointer swap between the write buffer and the middle man buffer, so we put synchronization (mutex in this tutorial) around both pointer swaps.
 Now the read buffer is available for the consumer to read.
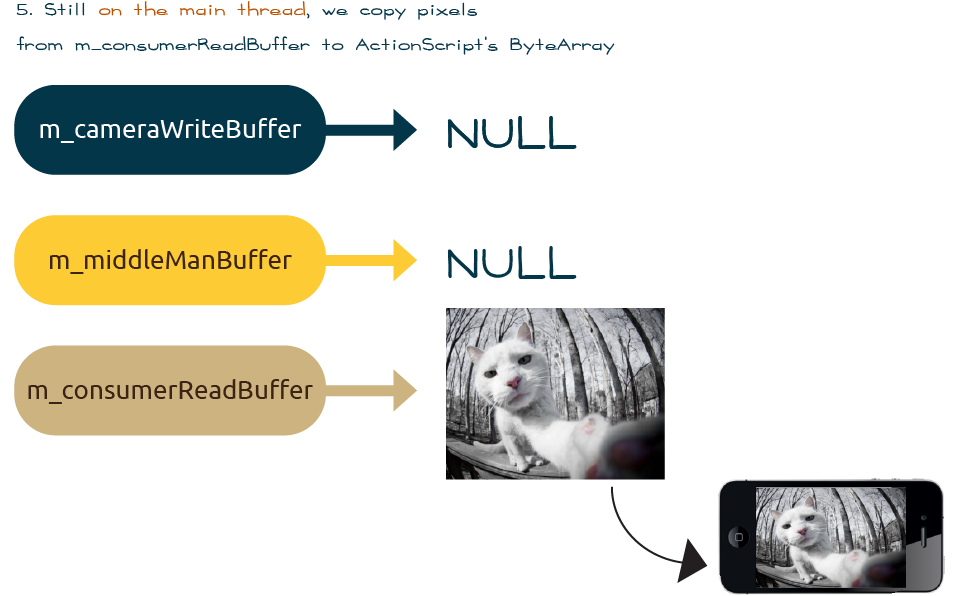
Last, get the read the read buffer to release hold of the memory block, so it can be garbage-collected.
Job done. We’ve blocked the process (with mutexes) only for two pointer swaps, which are very quick. We’re also not hogging too much memory.
Note: This example is out of a tutorial which uses reference counting in Objective-C, which is why we don’t do the memory deallocation explicitly.
What’s next?
If you are doing the Camera Tutorial, here are your next steps:
- This article is a companion to Part 6: Grab frames from iOS camera (15-20 minutes).
- This is followed by Part 7: Pass video frames to ActionScript (15-20 minutes).
- Here is the table of contents for the tutorial, in case you want to jump back or ahead.
Check out the DiaDraw Camera Driver ANE.

Leave a Reply